May 13, 2010

Pakora with Cilantro Chutney and Tamarind Sauce

Filed under: Appetizers — by Carla

pakora_113

Like most people, I crave something fried and spicy every now and then. But, I’m picky about fried foods and rarely eat them out. I am far too often disappointed by the greasy over or under cooked fried dishes served in restaurants. This is definitely one of those times when the adage “If you want something done well, do it yourself” comes into play. There are times when firing up a pot of hot oil is exactly what you need to do in order to taste something truly amazing. So, yesterday I decided to make up a batch of one of my favorite foods, pakora…tasty little chick pea fritters flavored with Indian spices, grated potato and onion. They are truly one of the best fried things you’ll ever put in your mouth, especially when dipped into tart cilantro chutney and sweet and sour tamarind sauce. Kind of what I’d imagine Indian carnival food would taste like, the tender, fluffy spiced insides and crispy, crunchy outsides of these fritters dipped in tangy sauces just explode with eastern flavors.

I prefer to use sweet potato instead of the standard spud in these fritters because it adds a nice sweetness but, I also love the color of the bright orange specks throughout the pakora. I’m a sucker for both sauces, but if you’re only going to make one, the coriander chutney comes together pretty quickly. I use the leftovers on top of grilled chicken or pork, in tuna fish salad, coleslaw. You get the idea. I’m not going to gloss over the fact that you might have to find an Indian or Hispanic grocery in order to get the block of tamarind paste for the tamarind sauce, but believe me when I say that the search is worth every minute. Tamarind wakes up the flavor of everything it’s partnered with and it also makes a great glaze to baste over grilled lamb, beef or poultry shish kabobs, so you’ll get multiple uses out of it.  

This is definitely one of those projects that lends itself to a group effort, so plan on making a double batch (no need to double the sauces) so that there will be plenty of bites for everyone. I’ve often made these as a starter to a simpler meal of easily reheated Indian dishes such as korma or vindaloo. I can’t guarantee that pakora will change your life, but a new standard will be set for the taste of freshly ground spices and perfectly fried food which is a good day in the kitchen any way you measure it.

Kitchen Counter Point: If you want to taste the real deal spice-wise, the extra step of toasting the whole spices, cooling and then grinding them up is the way to go. I’ve given you a simple recipe for garam masala, a spice blend that once made, will find its way into gilled meats, vegetables, sauces and marinades. It’s warm and kind of sweet with the flavors of coriander, cinnamon, clove, cumin and pepper. Just pick up a coffee mill at the discount store and dedicate it solely to grinding up your spices fresh. You won’t believe the amount of flavor in toasted and freshly ground spice. It’s kind of like the difference between freshly ground coffee and coffee that’s been ground up and sitting in a warehouse for 6 months. It’s alive and vibrant… a big difference. But you’ll never know unless you try it!

Makes about 12 medium sized pakora

3/4 teaspoon salt
1/4 teaspoon cayenne
A few grinds of black pepper
1 1/2 teaspoons garam masala, recipe follows
1 cup chick pea flour
1/4 teaspoon baking soda
3/4 cup water
1 small onion, thinly sliced
1/2 sweet potato, peeled and grated
2 tablespoons fresh cilantro, minced
2 cups vegetable oil for frying
Cilantro Chutney, recipe follows
Tamarind Sauce, recipe follows

Combine the salt, cayenne, black pepper, garam masala, chick pea flour and baking soda in a large bowl. Add the water, onion, potato and cilantro and mix well. You should have a lumpy batter.

Heat the vegetable oil (enough to come up 3-inches) in a heavy pan or skillet to 360ºF (It really helps to have a deep fry thermometer for this. Pick one up at the grocery store.). Drop the batter by heaping 2 tablespoons into the hot oil (about 3 or 4 at a time) and cook the pakora for 1 1/2 minutes. Keep an eye on the thermometer as the temperature of the oil will plunge as you add cold batter. Adjust the heat accordingly. Turn the pakora and cook on the second side for another 1 minute. Remove the pakora from the oil with a slotted spoon and transfer them to a paper towel lined sheet pan. Continue to cook the remaining batter in the same manner. You can keep the pakora hot by placing them as they are fried into a 200ºF oven.

Serve the pakora hot as an appetizer or a snack with cilantro chutney and tamarind sauce on the side.

Garam Masala

1 cinnamon stick, broken into small pieces
1 tablespoon cardamom seeds
2 tablespoons whole cloves
2 tablespoons coriander
2 tablespoons peppercorns
2 tablespoons whole cumin seeds

Heat a large skillet over medium heat. Add the spices and stir until fragrant, 3 or 4 minutes. Continue to stir and watch the spices carefully so that they don’t burn.. Remove the spices to cool.

Grind the garam masala in a spice or coffee mill dedicated to that purpose. For the best flavor, store the spice at room temperature in an airtight container for up to 3 months.

Fresh Cilantro Chutney

Makes about 1 cup

2 cups cilantro leaves, lightly packed
1 fresh serrano chili, seeded (taste the chili and use more or less to suit your taste)
One 2-inch knob of ginger root, peeled and chopped
1/4 cup sweetened coconut
1/4 cup fresh lemon juice (about 2 lemons), plus more if needed
1 teaspoon salt
1/4 teaspoon freshly ground black pepper

Combine all the ingredients in a food processor until finely chopped. Refrigerate, covered, for up to 2 days. If the chutney looks dry, add more lemon juice or a splash of water. There should be a little bright green liquid surrounding the solids.

Tamarind Sauce

 tamarind_1141

Tamarind can be found in a few different forms. It can be a compressed block, with the fibrous seeds and connective fibers that must be soaked and strained. It can come in a wet, seedless block. Or, it can come in a jar as tamarind concentrate. My favorite is the wet seedless block, though it still may contain seeds and should be handled using the soaking method below.  If you have the concentrate, just use about 1/2 cup of the liquid and omit the soaking and straining directions. You won’t have the volume and the sauce won’t be as thick, but it will still taste great.

1/2 cup tamarind paste, chopped into pieces
1-1/2 cups boiling water, divided
1/4 cup brown sugar
1/4 cup molasses
1/3 cup golden raisins
2 teaspoons finely minced ginger root
2 teaspoons salt
1 teaspoon garam masala
1/2 teaspoon cayenne pepper

Place the tamarind paste in a large bowl and cover with 1 cup of the boiling water. Let the paste soak until the water is cool enough so that you can break apart the tamarind with your fingers. Add the remaining 1/2 cup of boiling water and let stand again until just warm. Strain the mixture into a medium bowl, discarding the fibrous pulp.

To the tamarind liquid, add the sugar, molasses, raisins, ginger root, salt, garam masala and cayenne. Taste for seasoning and let the sauce sit for at least 1 hour at room temperature or overnight in the refrigerator. Let come back to room temperature before serving. Can be kept up to 1 week, refrigerated.

April 26, 2010

Cheese Ravioli with Fried Sage and Browned Butter

Filed under: Pasta — by Carla

cheese-rav_106

I love to cook just for me.

Not normal at all, I know, but when my husband is away for the night, I often turn on the Coltrane, Krall, Ray Charles, mix a cocktail and improvise dinner with whatever is in the house. The other night I had a yen for pasta. Whether using a hand cranker or the electric KitchenAid -roller, making pasta is a lot of fun. You take a little blob of dough and turn it into something ethereal…a magical silk purse from a sow’s ear sort of thing.

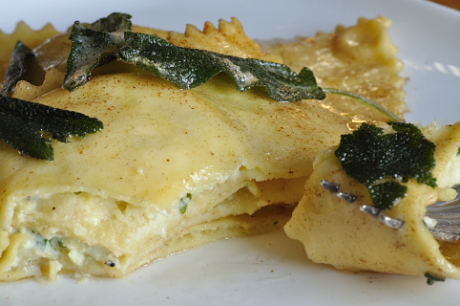
After a rummage in the frig, I found a smidge of ricotta left over from last week’s lasagna, goat cheese, a wedge of Parmesan, mozzarella, and a bunch of sage leaves. Of course, it all added up to cheese stuffed ravioli with fried sage and browned butter. I flipped on the music (added Big Night to the mix), lit the fire and had a great time making and eating those tender cheese stuffed bites. The salty/creamy, stuffed ravioli juxtaposed with the browned butter and fried sage is one of my favorite flavor contrasts. I’m not crazy about the taste of raw sage, but when fried to a crisp in butter it morphs into something delish. The bonus is that the butter takes on the flavor of the sage turning it into a nutty, sagey sauce. The dish paired beautifully with a breezy little Sauvignon Blanc from Spain appropriately named Las Brisas.

Every time I roll pasta I’m reminded of the creative time spent with those Playdoh factories we had as children. Oh, the hours spent extruding shapes and molding imprints with brightly colored blue, red, yellow and white Playdoh. And here I am, still having a great time playing with dough. Only now the reward is dinner. For one.

cheese-rav_104

Kitchen Counter Point: It’s definitely no fun for your hard earned ravioli to come undone in the cooking water. That’s why it’s important that you push the air from the inside edge of the filling to the outer edge of the pasta when sealing it. If air remains inside the sealed pasta, it expands when heated and pops open your pasta, so this is a pretty important tip. Also be sure to seal the ravioli, pressing down on the seams to make sure that they don’t come unhinged. I like to use a fork.  Finally, cook the ravioli at a gentle boil. That way the force of the bubbles is less likely to burst those little pillows apart.

cheese-rav_107

Serves 1 (plus leftovers for lunch the next day)

Pasta (or use purchased fresh pasta sheets)
Makes about 1-1/4 pound, serves 4-6 (extra can be frozen for another day)

2-3/4 cups all purpose flour, plus more if necessary
4 large eggs
1 teaspoon salt

Filling
1/3 cup ricotta cheese
1/4 cup mozzarella cheese, grated
3 tablespoons goat cheese
2 tablespoons Parmesan, grated
1 egg yolk
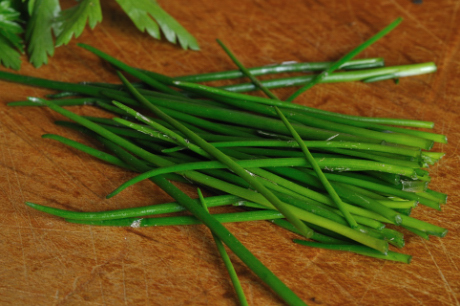
1 teaspoon fresh chives (if they’ve come up in your garden yet), minced
1 teaspoon parsley (ditto), minced
Pinch salt
Pinch freshly ground black pepper
Pinch cayenne
Pinch nutmeg

4 tablespoons unsalted butter
6 large sage leaves
Salt and freshly ground black pepper to taste
Extra Parmesan cheese

Place flour and salt in the bowl of a food processor. Add the eggs and pulse several times until clumps of moist dough form. Turn the dough out onto lightly floured work surface. Divide it into 4 piles, gather each into ball and knead until smooth, sprinkling lightly with flour if sticking, about 3 minutes. Wrap in plastic. Let the dough rest at room temperature at least 20 minutes.

While the dough rests, combine the cheeses, egg, herbs, salt, pepper, cayenne and nutmeg and taste for seasoning.

Rolling dough into sheets:
Freeze two of the dough balls for another time. Set the pasta machine to the widest setting. Working with one piece at a time, and keeping the other covered, flatten the dough into a rectangle and run ut through the machine. Fold it in thirds crosswise, as if you were folding a letter. Dust the outside lightly with flour and putting the open end through first, run through roller again. Repeat this process on the widest setting until the dough is smooth and elastic. It may take 3 or 4 times. This is a continuation of the kneading process and gives the dough a chance to absorb more flour if it is too sticky. Then continue to roll through the narrower settings (one time through each setting, without folding). Dust lightly with flour as needed to keep it from sticking, until the pasta sheet is the desired thickness (if hand cranking, roll all the way to the thinnest setting and if using the KitchenAid roller roll it down to #5). Place the sheet of dough on a lightly floured work surface. Repeat with the remaining pasta piece. If the pasta tears at any time during the rolling process, just fold it in half, dust the outside with flour on both sides and run it through the same setting one more time.

Bring 4 quarts of water to a gentle boil.

Fill a small bowl with water and a pastry brush. Dust the counter lightly with flour. Lay out the long sheet of pasta, fold it in half and make a mark on the dough at the halfway point. Open the strip of dough out again and brush half the surface very lightly with water. Drop small spoonfuls of your filling on the damp pasta sheet, about 2 inches apart. Fold the other half over the filling, making sure all the filling is covered and at least a 1-inch border remains around the edges. Using your index finger, gently press out the air pockets around each mound of filling. Use a sharp knife, pizza cutter or ravioli cutter to cut each ravioli into squares and press down on the edges with the tines of a fork to make a tight seal. Dust a sheet pan with flour to prevent the pasta from sticking and lay them out on the sheet making sure not to let them touch. Repeat with remaining dough sheet  and filling.

Heat a large sauté pan over medium heat and add the butter. When it is sizzling hot, add the sage leaves, brown them on both sides and then transfer them to a plate. It should take about 2 or 3 minutes. The butter should be browned and full of sagey flavor. Remove the pan from the heat making sure that it doesn’t burn.

Add 1 tablespoon of salt to the boiling water. Drop the ravioli into the boiling water and stir, making sure that they don’t stick on the bottom. Cook the ravioli at a bare simmer until just tender, about 4 minutes. Drain into a colander or scoop from the water with a slotted spoon and add the ravioli to the warm browned butter. Toss gently to coat. Pour the ravioli out onto a heated plate and top with the fried sage leaves, a sprinkle of salt and freshly ground black pepper. Garnish with extra grated Parmesan cheese if desired

April 15, 2010

Chocolate Orange Shortbreads

Filed under: Cookies, Uncategorized — Tags: — by Meredith

chocolate-shortbread-0251

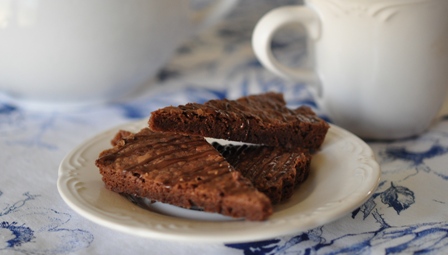
One of life’s little luxuries I enjoy the most is afternoon tea. There’s almost nothing better and it’s possibly the best part of being able to work at home. I might eat lunch on the run or at my desk, but I always make a concerted effort to sit down in the afternoon, when the house is quiet, before the kids come home, and have a cup of tea. And of course, what is a cup of tea without a cookie. And really, what is a cookie if it’s not chocolate.

This Chocolate Orange Shortbread, from The Mixer Bible, Second Edition is one I often turn to when I’m looking for a culinary Calgon moment. It’s rich, buttery goodness is ever so slightly cut by a bright note of orange, and the dough comes together so easily. For this recipe, we are making it in a mixer, but it could just as easily be done in a food processor or even by hand.

chocolate-shortbread-0121 Kitchen Counter Point- Although these cookies are great rolled out and cut into rounds, for a different twist, I also like to roll out the dough slightly and then press it into a small (I use a 7-1/2 inch), fluted tart pan with a removable bottom. It takes about 20 minutes to cook and I cut the cookies into wedges with a serrated knife when they are still slightly warm. You will need two tart pans for this recipe, or just keep one half of the dough chilled while the other is baking and then repeat the process. Make sure to thoroughly cool down your pan though before pressing the second batch of dough in. You don’t want to melt it before it gets in the oven.
Chocolate Orange Shortbreads

Makes 2 dozen cookies
1-1/4 cups all-purpose unbleached flour
1/4 cup cornstarch
1/4 cup unsweetened cocoa powder (preferably Dutch-process)
1/2 tsp salt
1 cup unsalted butter, room temperature
1 tbsp orange zest, finely grated
1 cup powdered sugar
1 tsp vanilla
3 oz bittersweet (not unsweetened) or semisweet chocolate, chopped

Position racks in top third and bottom third of oven and. Sift first 4 ingredients into medium bowl. Set aside.

In the mixer bowl, using the paddle, beat butter in large bowl until fluffy. Stop to scrape bowl down. Add in the orange zest and reduce the speed to low. Beat in powdered sugar and vanilla. Add dry ingredients and beat until well blended. Gather the dough into a ball, cover in plastic wrap and chill for 30 minutes.

On a lightly floured surface, roll the dough out to 1/4-inch. Cut into 2-inch circles and place 1-1/2-inches apart on prepared baking sheets. Bake shortbread for 5 minutes. Reverse sheets. Bake until shortbread looks dry and feels firm to touch, about 5 minutes longer. Cool on sheets for 1 minute. Remove to racks and cool completely.
Place the bittersweet chocolate in metal bowl set over saucepan of barely simmering water. Stir until chocolate is melted and smooth.

Fit a pastry bag with 1/8-inch plain tips; spoon chocolate into the bag. Or, spoon chocolate into a small plastic bag (cut off 1 tip from each bag). Pipe chocolate
decoratively over cookies. Let stand until chocolate sets, about 1 hour. (Can be made 2 days ahead. Store airtight in single layers between sheets of waxed paper.)

April 2, 2010

Pan Fried Arctic Char with Red Wine Sauce

Filed under: Seafood — by Carla

arctic-char_110

I’ve been craving fish lately. Like my father before me, I have a tendency to cater to my body’s cravings… not always healthy ones vis à vis Belvedere martinis and Vosges chocolate, but I do sometimes find the will to accommodate wholesome urges.  And so this morning I set off to the fishmonger to scope out his most recent arrivals. As luck would have it, there were many worthy fish in the case to choose from but I couldn’t resist the call of the Arctic char. Its beautiful dappled skin glistened. Its neon orange flesh looked rich and moist. He had obviously been swimming only moments before. A magnificent specimen, I had them wrap him up with a little bag of ice to keep chilled for the ride home.

A quick stop at the grocery rounded out dinner. A few bunches of aspiration broccoli found their way into my cart along with a bag of cremini mushrooms for a risotto. But, before continuing on I must succumb to a bit of a brag. This was no ordinary week-night. My son Corey and his soon-to-be bride, Lyndsey, were coming over for a celebratory dinner. A recent college graduate, he’d just gotten his first “real” job.

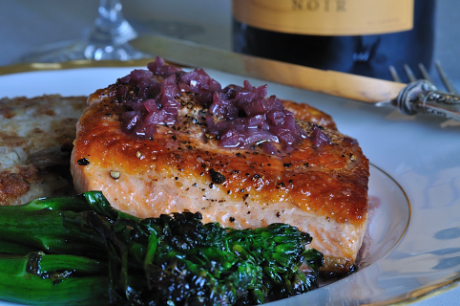
Because I wanted the meal to be prepared quickly once the kids arrived, I made the risotto earlier in the day, chilled it off and shaped it into risotto cakes which are quite possibly even better than risotto with their crispy outsides and creamy ins. The leggy broccoli needed only a zap in a pan with nothing more than olive oil and garlic. As for the fish, after a quick sauté I made a red wine sauce by adding a bit of shallot and about 3/4 cup of wine to the pan. I used an Oregon pinot noir since that was the wine that we were drinking at the moment. In about 2 minutes it had reduced sufficiently and only required a tablespoon or so of butter to gloss it up.

As you can imagine, the fish was superb. So fresh and artlessly prepared, it was a lesson in simplicity. While sipping the last of the wine, I mused on a day that began with a craving for fish and ended with two cravings satisfied. One for the tastebuds and another in witnessing two young lives successfully launched. Ahhh… life is good.

arctic-char_108

Kitchen Counter Point: The simple rule to remember when cooking fish is 7 minutes per inch. So if your filet is about 1-inch thick, it will take roughly 7 minutes to cook it through. Because it takes a minute or so for the cooking to actually begin, I usually cook a filet for about 4 minutes on the first side and then 3 on the second side. I use a medium high heat because I like the flesh to brown a little. When cooking a thicker filet like halibut, I will brown it on both sides and then pop it in a hot oven, pan and all, for about 5 minutes so that it has a chance to cook through. Simple, really.

Serves 4

4 six ounce filets of arctic char, skin on
Salt and freshly ground black pepper
2 tablespoons extra virgin olive oil
1 small shallot, minced
3/4  cup red wine (pinot noir, syrah, or a blend)
1 tablespoon unsalted butter

Salt and pepper the fish. Heat a large heavy skillet over medium-high heat. Add the olive oil and when hot add the fish skin side up. Cook for about 4 minutes, flip and cook for another 3 minutes. Transfer the fish to a heated plate and cover with foil.

Pour off any fat in the pan. Return the pan to the heat and add the shallot. Saute for about 1 minute or until the shallot is tender. Add the wine and cook for about 2 minutes or until reduced by half. Add the butter and swirl to blend.

Plate the fish and pour over the red wine sauce. Serve immediately.

March 23, 2010

Fiery Thai Beef Salad

Filed under: Salads, Stews, Uncategorized — by Meredith

beef-salad

I pride myself on being a hardy soul. Someone that never gets the winter blues. But I have to admit, with the sun shining and warm weather on the way, I’m happier than usual that Spring has sprung. This is the time of year I’m ready to put away my beloved, hard working Le Creuset and fire up the grill, even if my neighbors think I’m crazy. Apparently they don’t find 40 degrees to be short sleeve weather. It is to me though. Especially after months of 20 degrees and lower. This is exactly the time when I need to heat up from the inside out with something bright and fresh like this Fiery Thai Beef Salad.

They say that the heat from chiles, or capsaicin, prompts the release of endorphins, those “feel good” opiates naturally released in the body. If that’s true then my, oh my, does this salad feel good!

Light and refreshing, flank steak is nestled with lemongrass and mint on a bed of romaine and drizzled with a lime-chile vinaigrette. If you’re a chilehead, this is the dish for you and feel free to add as many chiles as you dare. This is the perfect dish for those trying to cut back on fat, because the steak is lean and the dressing is fat free.

0141Kitchen Counter Point: When working with fresh lemongrass it’s important to use the tender part of the inner stalk. When you trim the root end, you should be able to see rings. If you still see a woody center, you’re not far enough up the stalk. Once you trim the root end, you should have about 4 inches of tender stalk before you get to the tough section towards the end.

Fiery Thai Beef Salad

Serves 4

1 pound lean flank steak
1/4 teaspoon salt
1/8 teaspoon pepper
1/4 cup cilantro plus additional for garnish
2-4 Thai bird or Serrano chilies
2 garlic cloves
1 tablespoon fish sauce
1-1/2 tablespoon light brown sugar
1/3 cup lime juice
6 cups romaine lettuce, torn into bite-size pieces
16 cherry tomatoes, quartered
1/2 medium red onion, sliced thinly
1 stalk lemon grass, tough outer leaves removed, finely chopped (see tip)
1/4 cup fresh mint, chopped

Season the steak with salt and pepper. Prepare grill or broiler. Place steak on grill rack or broiler pan and cook 5 minutes on each side or until the meat is a medium rare. Transfer to a cutting board and let rest for 15 minutes.

Meanwhile, combine cilantro, chilies, garlic, fish sauce, sugar and lime juice in a blender. Blend until smooth.

Cut steak thinly across grain.

Mound the lettuce in the middle of a serving tray. Drape the beef slices on top of the lettuce and surround with the tomatoes, lemongrass, onion and mint. Drizzle with the dressing and garnish with additional cilantro leaves. Serve immediately.

March 12, 2010

Swiss Chard Fritatta with Bacon, Potatoes and Feta

Filed under: Egg Dishes — by Carla


swiss-chard-frit_096

There is much to be said for a light supper. We don’t always want or need a large meal in the evening and so when hubby and I are feeling only a bit peckish, a frittata is one of our favorite dinnertime solutions. Similar to an omelet, but without the technique laden flip and fold, it’s a quick and easy one pan meal with no special shopping necessary. As long as I have a few eggs  there are usually plenty of tasty ingredients on hand in the pantry and refrigerator to fill out the dish. 

Omelets and frittatas are one of the best ways to utilize those leftover bits from previous meals that don’t quite add up to a proper meal for two, but for this one night  I had to start from scratch. No leftover Chinese cartons of fried rice or mac and cheese peeked back at me from the inside the frig. However, I did have a lovely bunch of Swiss chard and decided that IT should be the centerpiece of the dish. What made this frittata different from the ones I’ve made in the past was that I used the whole bunch of greens and a smaller amount of potato so that  the greens actually created the bulk of the dish. I think the combination resulted in a more toothsome frittata, and I’ll stick with this high vegetable ratio  whether filling the eggy cake with broccoli, asparagus, mushrooms or other countless vegetable combinations the next time.

To give the filling extra flavor I cooked the onion, potato, chard stems and greens in bacon fat. In my opinion, just a touch of salty pork makes everything taste better, but if you want to keep your frittata on the vegetarian side, skip the bacon and substitute a few tablespoons of extra virgin olive oil. To make the meal seem less Spartan, serve this simple meal with a glass of wine à la Elizabeth David who “regard(s) a glass or two of wine as not, obviously, essential but at least an enormous enhancement of the enjoyment of a well-cooked omelet.” I’m not sure of Elizabeth’s wine preference, but I prefer a non-oaked chardonnay with most egg dishes.  If you can find it,  Kim Crawford makes an especially nice yet inexpensive quaffer.

So there you go. The recipe for a simple, civilized meal is probably lurking in your refrigerator at this very moment. Elizabeth David said it best, “Let’s just have an omelet (or frittata) and a glass of wine”!

swiss-chard-frit_095

Kitchen Counter Point: When it comes to filling omelets and frittatas, greens reign supreme. Dark green leafy vegetables are, calorie for calorie, perhaps the most concentrated source of nutrition of any food. Chard is one of my all time favorites. I just love the magenta stems and leathery green leaves, but don’t overlook other tasty options such as escarole (yes, the lettuce), frisée, collards, dandelion, arugula, mizuna and spinach. I haven’t included kale here, because it is very tough and most times needs more than a quick sauté to render it tender. As I said above, greens love salty pork, but they also have an affinity for onions and garlic.  I usually begin the sauté in olive oil with the onion and stems, followed by the greens and then add the garlic for only the last few minutes to insure that it doesn’t over brown and become bitter.

Serves 2

1 tablespoon extra virgin olive oil
4 slices bacon
1/2 small onion, sliced
1 Yukon gold potato, finely diced, about 1 cup
1 bunch Swiss chard, stemmed and thinly sliced, stems finely diced
Pinch salt
Pinch nutmeg
Grind of pepper
1 clove garlic, minced
5 large eggs, beaten with 2 tablespoons half and half, milk or water
1/4 teaspoon salt
4 grinds fresh pepper
Pinch Cayenne
1/2 cup feta cheese, crumbled

Heat the olive oil in an 8-inch cast iron or heavy skillet over medium-high heat. Add the bacon and cook until browned and crispy on both sides, about 3 minutes total. Remove the bacon from the pan and transfer it to a paper towel lined plate. Reserve.

Cook the onion in the hot fat in the pan until it softens, about 3 minutes. Add the finely diced potato and chard stems, reduce the heat to medium and sauté the potato, stirring every now and then until tender, about 4 minutes. Add the Swiss chard in bunches, adding more greens as they wilt and room allows. When the chard is wilted, add the pinch of salt, nutmeg, pepper and garlic and cook for about 4 minutes or until the greens are tender.

Beat the eggs with the salt, pepper and pinch of cayenne.

Set the oven rack to the second highest position and preheat the broiler.

Crumble and sprinkle the reserved bacon and feta cheese into the greens and pour the eggs evenly over all. Reduce heat to medium low and cook for 2 minutes, covered. Uncover and transfer the pan to the broiler and broil for about 4 minutes or until the eggs are set and the top is browned. Remove the frittata from the oven and let rest for 3 minutes before cutting into wedges. Serve hot or at room temperature.

March 3, 2010

Green Posole with Pork and Chicken

Filed under: Uncategorized — by Meredith

green-posole-2

While I’ll admit that March finds many people drinking green beer and wearing often disturbing green attire, my attention turns to one of my favorite and seasonally color appropriate dishes, Green Posole with Pork and Chicken.
Posole is a Mexican soup with meltingly tender pieces of shredded pork and chicken and earthy hominy, so thick in the spicy, tomatillo and chile flavored broth that calling this a soup is a stretch. It lands somewhere between the soup and stew category, which makes it a wonderful dish to turn to for hearty appetites.
Growing up in San Diego, with it’s rich heritage of wonderful Mexican food, you’d think this dish would have been a childhood staple, along with my mothers chile rellenos and tacos, but I had never tried posole until I took a trip through New Mexico, where it’s a culinary staple, with my husband many years ago. What I love most about the dish is it’s deeply comforting quality. There is something so soul-satisfying about hominy, which will come as no surprise to my Southern friends who’ve been enjoying this ingredient in it’s many forms forever. My Texas grandma loved it and served it often, which probably accounts for my attraction to it. In posole it finds a wonderful home, nestled in with the shards of meat and makes the perfect foil to the acidic tomatillos and spicy chiles.
Kitchen Counter Point: Because in many parts of the country tomatillos remain a mystery to the home cook, they are often left in the grocery store produce section way past their prime. The husk can often hide a bad tomatillo, so when your shopping for them look for fresh looking husks that aren’t discolored and give it a squeeze to make sure it’s firm and not squishy.

tomatillos

Green Posole with Pork and Chicken

Serves 8

2 tablespoons olive oil
1-1/2 teaspoon salt, divided
Freshly ground black pepper
2 pounds lean pork shoulder, cut into 2-inch chunks
2 pounds skinless chicken thighs
1 white onion, chopped
6 garlic cloves, thinly sliced
1 teaspoon dried oregano (preferably Mexican), crumbled
10 cups chicken stock
1 pound tomatillos, husked
2 serrano chiles
1/2 cup hulled (green) pumpkin seeds, toasted
1/2 cup chopped fresh cilantro
2 15 ounce cans white hominy, rinsed and drained
Avocado, diced
Cilantro leaves
Chopped sweet onion
Lime wedges

Heat the oil in a large pot over medium-high heat. Season the pork and chicken with 1 teaspoon of salt and freshly ground black pepper to taste. Working in 2 batches, so that you don’t overcrowd the pan, brown the meat on all sides, about 5 minutes a side. Remove the meat as you brown it and set it on a plate. Pour off all but 1 tablespoon of the fat.

Lower the heat to medium and add the onion to the pot. Cook until softened, about 6 minutes. Add the garlic and oregano and cook for another minute. Add the pork, chicken and chicken stock and bring to a boil over medium-high heat. Lower the heat to low and simmer, covered, for 1-1/2 to 2 hours, or until the pork and chicken are tender. Skim as much fat as possible from the top. Remove the pork and chicken from the broth and cool.

Meanwhile, place the tomatillos and serranos in a small baking dish under a preheated broiler. Broil until the tomatillos and chiles are blackened in spots, turn over and blacken in spots on the other side. Let them cool and remove and discard the stems from both the tomatillos and chiles. Transfer to a blender with the 1/2 cup of the liquid from the soup, pumpkin seeds, and cilantro. Blend until smooth.

When the meat is cool enough to handle, remove the skin and bones from the chicken and shred both chicken and pork into bite-sized pieces.

Strain the broth and discard the solids and return the stock to the soup pot. Add the tomatillo-pumpkin seed mixture and the hominy and return to a gentle simmer over low heat. Cook for about 20 minutes to allow the flavors to blend. Add the chicken, pork and remaining salt back into the pot and cook for 5 minutes.

Ladle into heated bowls and serve with the avocado, cilantro, onion and lime wedges.

February 22, 2010

Caramel Oranges with Cardamom

Filed under: Desserts — by Carla

caramel-oranges_092


This morning the view outside my kitchen window resembled a black and white photograph…white snow, black tree silhouettes and a gray sky. Though that isn’t always such a bad thing, today I felt the need to inject a little color into my life. I was in the mood to trade in black turtlenecks, woolly socks and downcast skies for a pair of flip flops, shorts and a poolside lounge chair but, finances and schedules ruled out a quick trip to the tropics.  Thinking I could bump out of my funk with a cooking project, I checked out the contents of my refrigerator when lo and behold,  nestled among the endive, radicchio and celery lay four naval oranges.Just looking at those bright orange balls raised my spirits. It’s citrus season and nothing beats oranges for that  tart, yet sweet at the same time taste. In a flash, I cooked up a batch of caramel oranges, a super easy dessert- breakfast-snack that always brightens my outlook. I like this dish best when it has been in the refrigerator for a few hours. The brittle caramel melts and makes an orangey, caramelly sauce that you’ll want to lick off the plate. This time, for a little exotic zip, I added a pinch of ground cardamom seeds to the syrup right before drizzling. I really liked how it perfumed the caramel with a hint of eastern pizazz. So even though the sun hasn’t graced us with its presence for a few weeks, today I have the taste of sunshine in my mouth. I just might make it to March after all.


cardamom_0911

Kitchen Counter Point: Cardamom is a warm, pungent spice used in sweet and savory Indian curries and some Scandinavian breads. You will find it in a few different forms at the grocery store. It can be bought as 1) pods, 2) whole seeds, and 3) ground. I like to buy it as whole seeds and crush or grind them just before using. That way the flavor is at its peak. Though you can buy the pods and crush them to free the seeds, it is a bit of a bother  to separate the seeds from the crumbled pod.

caramel-oranges_0901

Serves 4

4 naval oranges
1/2 cup sugar
3 tablespoons water
1/4 teaspoon cardamom seeds, ground in a mortar and pestle or a pinch of ground

Peel the oranges by cutting off the top and bottom to make them flat and then slicing around the circumference of the orange with a sharp knife, cutting away the peel and white pith. Then cut the orange crosswise into about 6 sections and arrange them on a heat-proof platter.

Add the sugar and water to a saucepan and swirl over low heat until the sugar has dissolved. Do not stir. Turn up the heat to high and bring to a boil. Once the syrup is boiling, cook it for about 4 minutes or until the syrup has browned to a rich caramel color. It will be very bubbly. Watch it closely as there is less than  a minute between sublime and burned. Add the cardamom seeds and swirl them to combine and drizzle the syrup over the oranges. Serve immediately or let sit in the refrigerator for a few hours so that the oranges macerate and make a caramel syrup.

February 5, 2010

Maple Brined Pork Chops with Sweet Potato, Apple and Mustard Sauce

Filed under: Meat Entrees — by Carla

 brined-pork-chop_084

 What is it about cold weather that makes you want to eat pork more than a few times a week? In the last month  we’ve eaten pig in a choucroute, braised with tomatoes and stuffed into marvelous little agnolotti, braised in milk, braised in coconut milk and rice vinegar (way tasty), as sausage in jambalaya, coffee rubbed tenderloin and numerous renditions of sautéed pork chops. To be honest, I haven’t tired of it yet. There are many theories about our urge to pimp the pig in the desolate days of winter, but to me it’s all about that sweet, tender meat that goes so well with winter vegetables. Hearty greens like collards and kale, the assorted hard squashes, sweet potatoes and apples, parsnips and rutabagas are natural partners with pork and make for a delicious week-night dinner for family or even a weekend meal for company.


In this recipe, I’ve paired the pork chops with two of my favorite go withs, sweet potatoes and Ginger Crisp apples. The appley mustard sauce you make at the end couldn’t be easier and moistens the pork, tying all the flavors together. Because pork chops can be a little on the dry side, I recommend that you brine them in this salty, sweet mixture for at least 2 hours. It really does increase  flavor and moisture, but if you don’t have the time, just go ahead and cook the pork chops un-brined. They will still be delicious. I’ve also given you an easy clean up by structuring this recipe so that you can cook the meat, potatoes and apples in one pan. Don’t bother to thank me. You’re welcome.

brined-pork-chop_0851

Kitchen Counter Point: Because center cut pork chops are a lean cut of meat, they are easily dried out by overcooking. But not to worry! Here are a few tips that will help you to cook juicy, flavorful pork chops every time.

1) Brine the pork as I direct in this recipe. The salty-mapley-garlicky-peppery-rosemary water creeps into the meat, flavoring and hydrating it so that when cooked, you end up with seasoned, moist meat.

2) Buy and cook the pork chop on the bone. It may take a few more minutes of cooking, but the bone gives up flavor and moisture to the surrounding meat.

3) Try not to over-cook the pork. Our moms and grandmothers cooked it to within an inch of being incinerated. Today’s pork is cleaner and leaner than grandma’s pig and should be cooked to an internal temp of about 147ºF. It will still be a bit rosy in the center.

4) Buy pork chops at least 3/4-inch thick because the thicker cut insulates the center so that juices don’t completely cook away.   

 Serves 4

2 cups water
1/3 cup pure maple syrup
1/4 cup kosher salt
4 cloves of garlic, smashed (no need to peel)
2 bay leaves
1 sprig rosemary, crushed
1 teaspoon black peppercorns, crushed

3 cups ice
4 center-cut, loin pork chops on the bone, about 3/4-inch thick

2 tablespoons olive oil
Freshly ground black pepper
2 sweet potatoes, thinly sliced
2 Ginger Crisp or other sweet-tart apples, peeled, cored and thinly sliced
1 cup apple cider or juice, plus more if needed
1/2 teaspoon ground cinnamon
1/2 teaspoon salt
1 1/2 teaspoons Dijon mustard
1 tablespoon fresh parsley, minced (optional)

Heat the water in a medium saucepan with the syrup, salt, garlic, bay leaves, rosemary and black peppercorns. When the water simmers, remove it from the heat and let sit for 5 minutes. Pour the brine into 2-qt. heat-proof bowl. Add the ice and when the mixture has cooled, add the pork chops to the bowl, cover and refrigerate for at least 2 hours and up to 24.

One hour before cooking, remove the pork chops from the brine and pat them dry. Lightly pepper them and let sit at room temperature until ready to cook.

Heat a large, heavy skillet with a lid over medium heat and add the olive oil. When the oil is hot, add the pork chops (they should sizzle) and cook for about 5 minutes on the first side, turn them over and cook on the other side for about 3 minutes. They will not be cooked through at this point but should be nicely browned.

Transfer the pork chops to a plate and add the potatoes, apples, cider, cinnamon and salt to the hot pan and bring to a simmer. Cover the pan, reduce the heat to medium-low and cook the potatoes for 13 minutes or until a little resistant when pierced with a fork.

Return the pork chops to the pan, nestle them into the potatoes, cover and cook for another 5 minutes or until the meat is cooked through and the potatoes are tender.

Transfer the pork chop, potato and apple to a plate with a slotted spoon and cover with foil, leaving the liquid in the pan. If the potatoes have absorbed the liquid, add 1/4 cup extra cider to the pan and heat. Stir in the mustard with a fork and taste the sauce for seasoning adding more pepper if desired.

Ladle the sauce over the meat and potatoes and garnish with the parsley if using. Serve hot.

January 23, 2010

Short Rib Chile with Ancho, Chipotle and Creamy Polenta

Filed under: Stews — by Carla

shrot-rib-chile_0551Last weekend my daughter, Jessica, asked me if I had any ideas for a new version of chile. A group of friends were going to hold a chile cook-off and she wanted to bring something to the party that was a little out of the box, but still satisfying in that chile, spicy sort of way. We figured, who doesn’t love short ribs? So after tossing some ideas around, we built a chile recipe using luscious short ribs instead of ground meat. After a good slow cook, the bones give up lots of gelatin for a rich and velvety sauce and the meat is melt in your mouth tender and moist. For the chile quotient, we decided to boost the flavor of store bought chile powder with freshly ground ancho and chipotle peppers, cumin, coriander, paprika, clove and cinnamon. The out of the box part of the recipe is canning the beans (no pun intended) and serving this cold weather staple with creamy polenta. Polenta is an intuitive partner since south of border dishes prominently feature corn. The end result is a smokey, rich and spicy stew with origins to the chile we all grew up with, but with oh, so much more sophistication. If the chile as usual compares to a comfy pair of old jeans, an icy cold beer and a football game, this new version is a cozy cashmere robe, a glass of pinot noir and Philadelphia Story…a still comfy classic which definitely has its place.

short-rib-chile_0561Kitchen Counter Point: It is a good idea to begin making this chile a day or more ahead. It takes a good 3 hours to cook the short ribs to the falling off the bone stage and an overnight in the frig allows the flavors to mellow and balance. I love to serve dishes like this for company or even a busy weekend family dinner because I can focus on the many other facets of hosting or visiting with friends and family instead of slaving to pull dinner together.  If, like my daughter, you’re transporting this dish to someone else’s house for a party and don’t want to stand over the stove for 15 minutes,  turn the polenta into polenta cakes. Just cook the polenta a little longer than the recipe directs and pour it into a buttered 8-inch square pan. Let it cool and firm up then chill. Cut it into 6 squares and brown the polenta cakes in a few tablespoons of butter. Transfer the cakes to a sheet pan and keep at room temperature for a few hours or refrigerate overnight and just reheat in a 350ºF oven when you get to the party. Their crispy outsides and creamy interiors will be sure to sway even the most ardent traditional chile fan.

Serves 6

4 dried ancho chiles, about 2 ounces, seeded, ribbed and torn into pieces (see tip)
1 cup boiling water
2 canned chipotle chiles in adobo (see tip)
2 tablespoons tomato paste
2 tablespoons honey
2 tablespoons balsamic vinegar
1 15-oz can Ro-Tel diced tomatoes (see tip)
4 slices bacon
Salt and freshly ground black pepper
4 lbs beef short ribs
2 medium onions or 1 large
1 red bell pepper, seeded and cut into 1-inch pieces
3 cloves garlic
2 teaspoons chile powder
2 teaspoons ground cumin
2 teaspoons salt
1 teaspoon ground coriander
1 teaspoon paprika
1/2 teaspoon freshly ground black pepper
1/4 teaspoon ground clove
1/4 teaspoon cinnamon
12 oz pale ale or beer
2 tablespoons cilantro, minced

Creamy polenta (recipe follows)

In a medium bowl, soak the ancho chiles in the cup of boiling water for 20 minutes or until softened. Weight the chiles down with a small saucer if the water doesn’t cover.

In a blender jar, add the ancho chiles and liquid, chipotle, tomato paste, honey and balsamic vinegar. Blend until smooth. Add the can of diced tomatoes and reserve.

In a large Dutch oven over medium heat, cook the bacon until it has rendered its fat and is crispy. Remove the bacon and transfer to a plate.

Pat the short ribs dry and salt and pepper them.  Saute half of them in the bacon fat over medium-high heat until browned on all sides, about 9 minutes. Transfer to a plate and brown the second batch and transfering them to the plate as well . Turn the heat down if the bottom of the pan begins to over brown or turn black.

Pour off all but a few tablespoons of the remaining fat and sauté the onion, red pepper and garlic until they begin to soften, about 3 minutes. Add the chile powder, cumin, salt, coriander, paprika, pepper, clove and cinnamon and cook for another 3 minutes. Add the chile-tomato mixture and cook for 2 minutes or until it simmers. Add the beer and short ribs and bring back to a simmer again. Cover, reduce the heat and cook at a low simmer for 3 hours or until the ribs are tender and falling off the bone.

When the ribs are done cooking, remove the meat from the braising liquid, cool and tear it into shreds. Discard the bones.

Degrease the sauce in the pan with a large spoon and discard it (there will be lots of grease floating on top). Bring the sauce up to a simmer and cook it for about 5 minutes or until it reduces somewhat. Taste and adjust the seasoning with more salt, pepper, balsamic, chipotle or honey. Return the meat to the pan and reheat. Serve the chile over creamy polenta and garnish with the cilantro and reserved bacon, crumbled.

Creamy Polenta

4 cups water
1 teaspoon salt
1 cup yellow cornmeal, preferably stone ground
1/4 cup heavy cream
1/4 teaspoon freshly ground black pepper

In a large saucepan, bring the water and salt to a boil over medium heat. Whisk in the cornmeal in a steady stream and continue to whisk for 2 minutes. Reduce the heat and stir with a wooden spoon every now and then until thickened, about 15 minutes. Stir in the heavy cream and pepper and adjust the seasoning to taste with more salt and pepper. Serve hot.

Tip: Ancho chiles are dried poblano chiles. They are brownish-black and wrinkled (see photo) and should be pliable and leathery. They’re mild to medium-hot and provide a sweet chile flavor to adobo sauce, enchilada sauce and commercial chile powders. The chipotle is a smoked jalapeno which has a medium heat. They can be found dried or canned and packed in adobo which is a spicy, vinegary tomato based sauce in the Mexican section (freeze the remaining peppers to use at another time). Ro-Tel is a diced tomato product with green chiles which you might find in the Mexican section as well. If you can’t locate it, just substitute a similar sized can of Mexican-style diced tomatoes.

Older Posts »